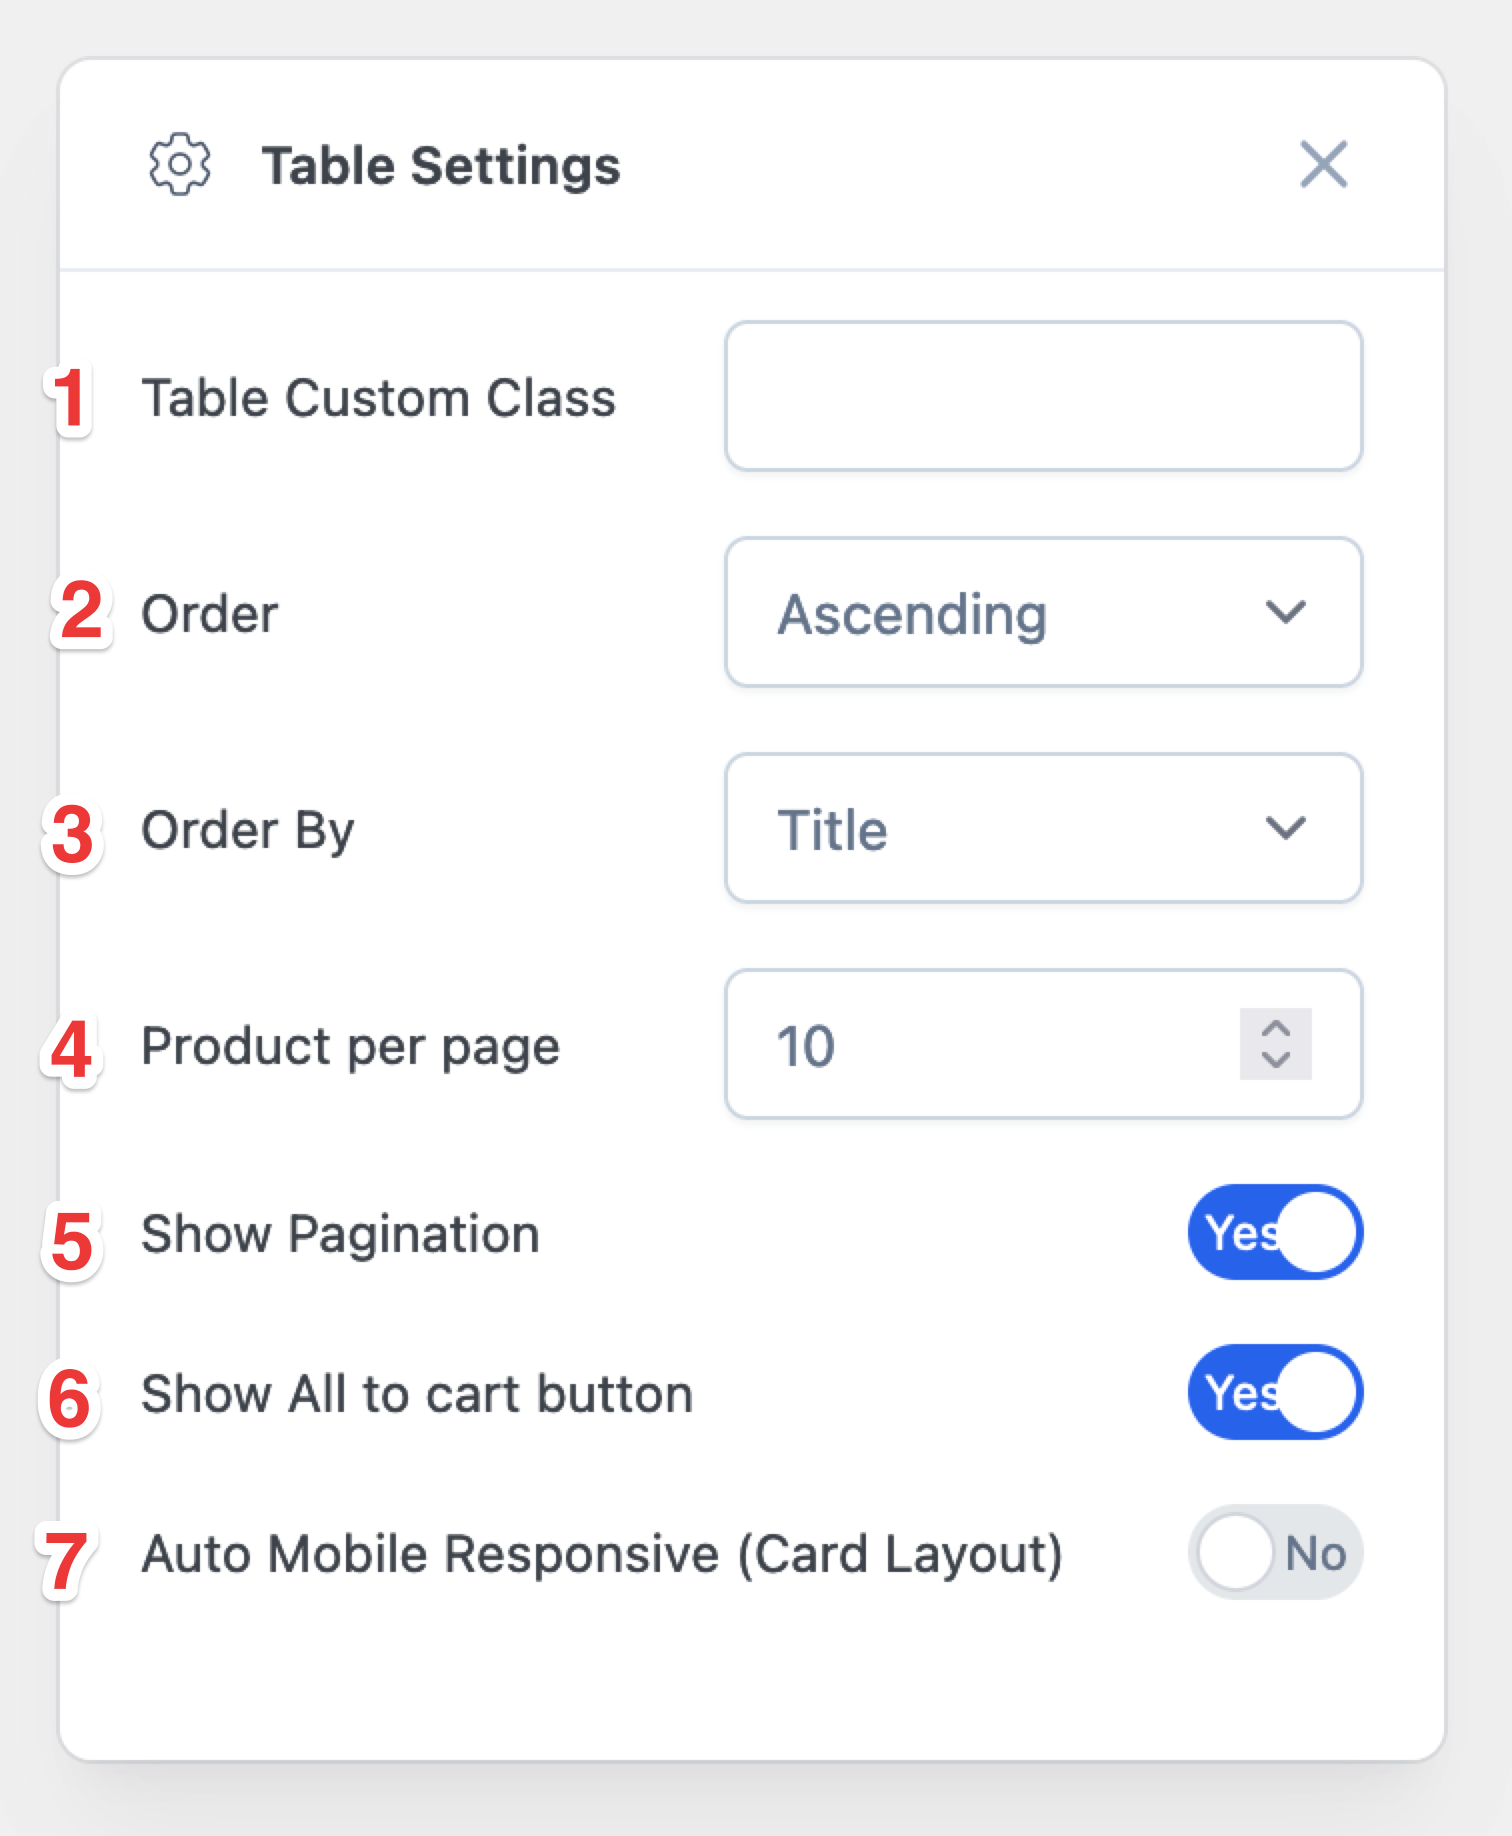
Individual Table Settings

Table Custom Class
Input Field: Use this field to add a custom CSS class to your table. This allows you to apply specific styles to your table by targeting the custom class in your stylesheet.
Example: my-custom-table
Order
Options: Set the default order for the table data. You can choose between ascending (ASC) and descending (DESC) order.
Values:
ASC– Ascending orderDESC– Descending order
Order By
Options: Specify the column by which the table data should be ordered. This should match the column name or identifier used in your table data.
Example: Popularity, Price, Rating, Reviews Count, Title, Slug (URL), Date, Date Modified, Rand, ID, Author, Type, Parent, Relevance, None
Default: ID
Product per page
Checkbox: Define the number of products to display per page. This setting works in conjunction with the pagination feature to control how many rows of data appear on each page.
Default: 10
Show Pagination
Checkbox: Enable or disable pagination for your table. When enabled, the table will display a set number of rows per page and provide navigation to move between pages.
Default: Checked (enabled)
Show All to Cart Button
Checkbox: Enable or disable the “All to Cart” button. When enabled, this button allows users to add all items in the table to their cart with a single click.
Default: Checked (enabled)
Auto Mobile Responsive
Checkbox: Enable or disable automatic mobile responsiveness for your table. When enabled, the table will adjust its layout to be user-friendly on mobile devices.
Default: Unchecked (disable)